This past season, we had a new camper who had never done chores at home before. When the cabin counselor handed her a broom and asked her to get under the bunks as much as possible, she actually smiled. By the end of the camp session, the counselor said that out of her entire group, that camper was the most enthusiastic about chores—perhaps because she’d never been trusted with those kinds of responsibilities before. She even asked the counselor if she could keep the cabin’s chore wheel to show her parents, so they could start using one at home.
There are a couple of reasons that I think chore wheels work so well for kids. First of all, it’s a colorful, interactive chart, but it also makes responsibilities relatively equal—because they rotate every day. In fact, for an added layer of fairness, we suggest that parents have places around the chore wheel, too. That sense of inclusion gives kids less reason to protest about their assignments (since everyone is stepping up to do their own assignments), but even more importantly, it gives the tasks more significance—and it helps kids understand how important their efforts are in keeping your home running, happy, and healthy.
I want to show you how to build a chore wheel so that you can incorporate this inclusive, team-building system into your family’s daily routine. It’s really easy to do; the only potentially time-consuming variable is how much you—better yet, your kids!—want to decorate it.
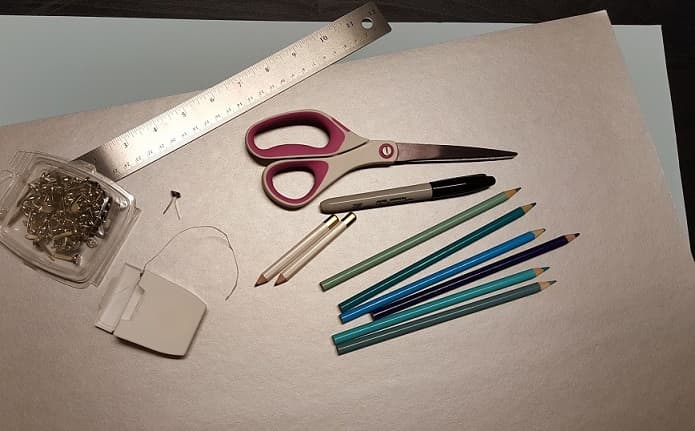
The Materials You’ll Need
If you’ve decided to work with cake rounds that are already cut, skip to Step 2. If you’d rather work with poster board so you can choose unique colors or because you already have some on hand, start with Step 1.
For this step, gather your poster board, scissors, floss, ruler, and two sharp pencils. Decide how big you want each of your circles to be. They could be 8 and 12 inches in diameter, or you could make your wheel bigger or 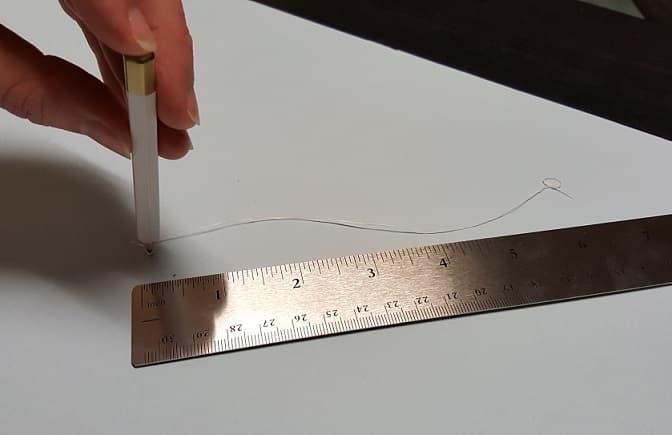 smaller to suit your space. You will want 3 or 4 inches’ difference between your circles’ relative diameters (a bigger difference in the circles’ sizes means more room for decorating people’s name spaces).
The floss or string will be your tool for drawing even circles quickly and easily (unless, of course, you have a compass from math class). To do so, you’ll knot two loops on a piece of floss, and you’ll want the distance between those loops to be half your intended diameter (your radius). So, if you’re planning to make an 8-inch and a 12-inch circle, you’ll need two pieces of floss, one with loops that are 4 inches apart and another with loops that are 6 inches apart.
 Now, find space on your poster board big enough for each circle. Estimate the central point of one of those spaces, align one of your floss loops on that space, and point one of your sharp pencils through the loop to poke the poster board. Hold that pencil firmly, and use your other pencil to thread through the loop on the other end of the floss. Your central pencil stays still, but the outer pencil draws all the way around, with the floss length guiding it. Then do the same with your other (bigger or smaller) circle, and cut both circles out. (You can opt to display the other side of the poster board circles if the pencil marks look a bit sloppy.)
You’ll want the number of sections on each circle to match the number of people participating in your rotating chores—like slices of a pie. Use your ruler and your thick marker (or a pencil if you’d rather measure out your pieces with the chance to adjust) to draw the lines that will separate each piece. Even though your circles are different sizes, you want them to have the same size pie pieces. If you have an even number of people, you can line your ruler up with the central pencil point and draw all the way across, from one edge of the circle to the other; if you have an odd number of people, you can line your ruler up with the central pencil point but draw each line to reach only from the center out to the edge.
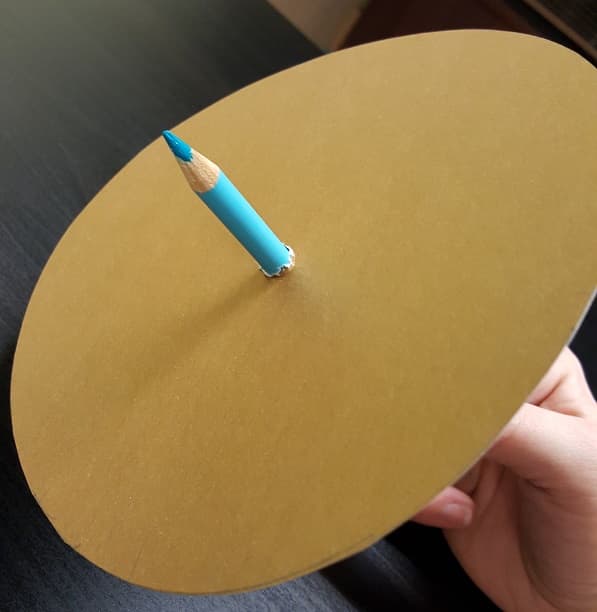
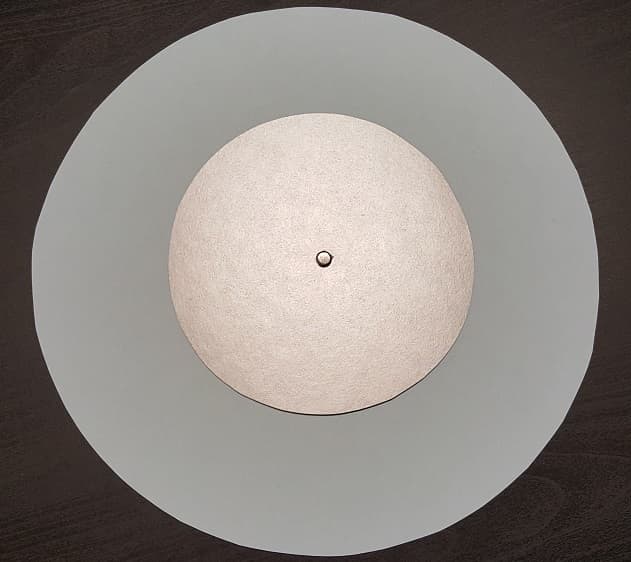
This is the one step that a parent should do rather than a kid. To keep your poster board or cake round from denting, don’t try and poke the hole in midair. Instead, put one of your circles down on a kitchen cutting board, aligning a sharp pencil (or other tool) with your central circle. Carefully pull up the edges of the circle with one hand, starting to work that central point into a hole. Once you break through, gently push your pencil through a little further to widen the hole. You’ll want the hole of your smaller circle to be a bit wider than the hole of your bigger circle, so it has the freedom to spin.
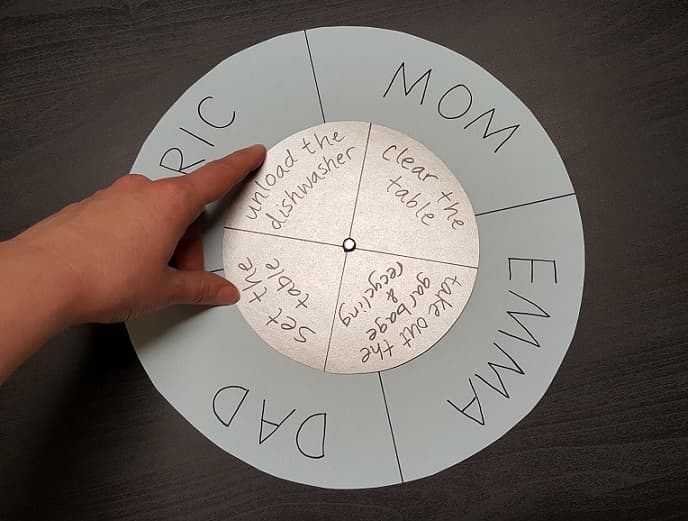
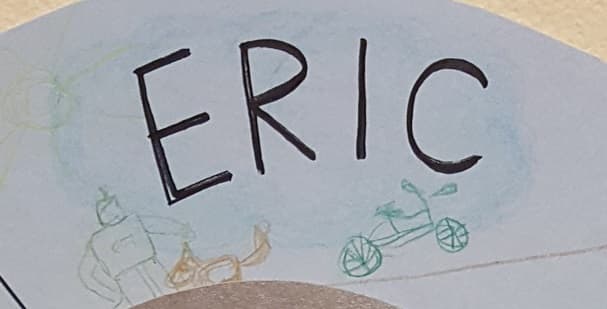
Now, it’s time to write out your names in the outer sections around the big circle and your tasks in the sections of the small circle. The small circle will be fastened on top of the big one, so you may want to stack them first to see how much space you have to write and decorate on the big circle. Use your thick marker or get creative with your colors to incorporate the names and chores. If you want, you can even reverse the roles of the two circles by putting names around the small circle, and chores around the big one.
Consider making one chore space a “Free Day.” This is something we like to do at camp because it rewards people for their hard work—and it rotates around just like everything else, so that break is spread out evenly, too. This might be more feasible if you have more than one chore assigned to each space, so that everything is still getting done.
 Step 5: Decorate Your Chore Wheel
You may want to cut out construction paper to decorate the different sections before you even write out the names and chores. However you choose to decorate, the sky’s the limit! Definitely get your kids involved in this part, especially decorating around their own names. Since it’s something that will always be displayed, it’s another reason for them to feel proud of their contribution; plus, it gets them engaged and excited right from the start.
Once your circles are labeled and decorated, you’re ready to fasten the circles together—the easiest part. Place the small circle on top of the big, and align their central holes, poking the metal brad through. Turn the wheel 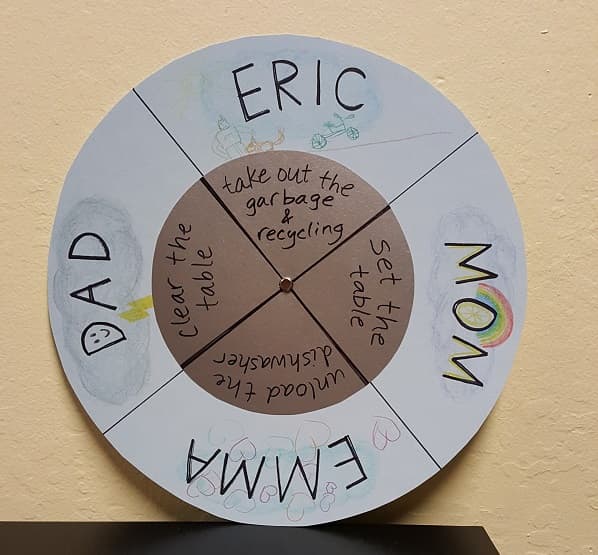 over to separate the brad’s two prongs, and push them in opposite directions until they each lay flat against the back of the largest circle. Try spinning the small circle around a little bit; if it’s hard to spin, loosen the brad just a bit so that there’s more wiggle room for that top circle.
With tape, sticky putty, a nail, or a pin, mount your wheel in a place that is visible and within reach for everyone. Be sure to fasten only the big circle to the wall, because the small circle needs to be free to spin.
In order to really promote the collaboration and team spirit in this mission to care for the home, create a daily ritual of gathering around the chore wheel and spinning it to determine each person’s responsibility for the day. Take turns spinning, so everyone has a fair chance to hold that responsibility, too. You could also rotate the 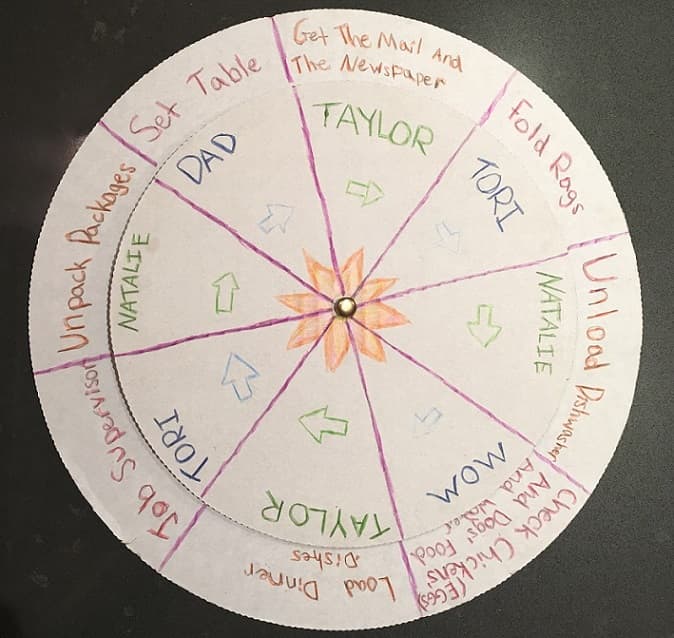 wheel on a weekly basis, so each person is practicing their chore for a whole week at a time. This may leave more room for kids to develop their own best practices and efficient ways of getting the job done before they shift gears into a new responsibility.
This chore wheel would also work well with a sticker chart or other system of accountability that kids can get involved with—some kind of reward system that honors kids for consistent efforts. Let this chore wheel system be a source of conversation about what responsibility is and how it stretches beyond the home. Be sure to let your kids know how important their efforts really are, that they really do make a difference in caring for the shared family space—and for each other.
If you’d like to find out more about how kids learn responsibility in the camp community, get in touch with us today. In fact, we’d love to hear how the chore wheel helped get your kids involved in family responsibilities: we’re all about believing in kids’ abilities to try new and challenging things.